Monday 27 January 2014

Walnut, Date, And Honey Cake

Hello boys and girls!

Welcome to cooking with Varun! You know, I was on Facebook a few days ago and I noticed that more and more people were adding 'Life Events', and I got to thinking, that in a time when my friends are adding events like, 'Got Engaged to..' or 'Married..', the most I can put up is, 'Learned to bake a cake!'. I know, I know, their life events aren't as great as mine, but let's face it, baking isn't for everybody! Now, now, don't look so put out, I'm only joking, but you cannot deny the joy you feel when you open the oven door and your kitchen is filled with the glorious smell of freshly baked cake. A joy eclipsed, perhaps, only by the act of cutting yourself a big piece and taking a bite of the warm, sweet, light sponge!

As far as cakes go, if baked right, I don't think there's such a thing as a bad cake. I mean, chocolatey and sticky or warm and nutty or even a good old fashioned Victoria sponge, just give me a big ol' piece of cake and I'll be in high heaven! And today, I'm going to walk you through a simple recipe that if you follow correctly, you will end up with a gorgeously soft and deliciously nutty cake that you can put together and bake in 90 minutes. Just imagine the beaming face of a loved one you can surprise on their birthday or anniversary or just about any occasion! But enough of this, on to the recipe!

For Walnut, Date, and Honey Cake, you will need the following:

Self raising flour                                   225 gms
Butter                                                  175 gms
Sugar (brown, if you can wangle it)        100 gms
Dates                                                   100 gms
Walnuts                                                50 gms
Honey                                                   3 tbsp
Bananas (ripe)                                       2
Eggs                                                      2 large
Cinnamon                                              1/2 tsp

Prep:
  1. Beat the eggs.
  2. Mash the bananas.
  3. Chop up the dates.
  4. Roughly chop the walnuts.
  5. Soften the butter.
  6. Grab a 1kg loaf tin to bake the cake in.
  7. Tear off a piece of greaseproof paper (that's the really smooth, kind of oily one).
  8. Use it to butter the inside of the loaf tin.
  9. Line the inside of the tin (bottom and sides) with greaseproof paper. (The butter will help it hold on to the tin. Post-baking, this will make sure your cake comes out in one piece without breaking or sticking.)
  10. Turn the oven on to 140 degrees Celsius if it is fan powered or 160 degrees Celsius if gas powered.
Method:
  1. Take a deep breath.
  2. Grab a large mixing bowl.
  3. Tip in the flour.
  4. Drop in the butter.
  5. Add in the sugar.
  6. Sprinkle in the cinnamon.
  7. Add in the honey.
  8. Pour in the eggs.
  9. Plop in the bananas.
  10. Throw in the dates.
  11. Toss in the walnuts.
  12. Grab a wooden spoon.
  13. Flex your biceps.
  14. Beat the contents of the bowl for about 3 minutes until your arm feels like it is about to fall off and the ingredients are well mixed.
  15. Tip the mixture into the baking tin.
  16. Use the wooden spoon to smoothen the mixture.
  17. Sprinkle some walnuts over the top.
  18. Open the oven door.
  19. Get hit with a heat blast.
  20. Curse.
  21. Slide the tin into the oven.
  22. Close the oven door.
  23. Clock watch for 60 minutes. (Or do something productive!)
  24. In 60 minutes, open the oven door.
  25. Get hit by another heat blast. (This time with the smell of fresh cake!)
  26. Remember you haven't got your oven mitts on.
  27. Put on your oven mitts.
  28. Gently take the tin out.
  29. Stick a knife in the cake.
  30. If the knife comes out clean (it will be buttery), turn the oven off. If not, bake for another 10 minutes.
  31. Lift the cake out of the tin using the greaseproof paper.
  32. Place on a cooling rack to cool for 10 minutes.
  33. Serve.
  34. Stuff face.
  35. Bask in the glory of your successfully executed dish.


Tip: You can drizzle some honey over the top as it cools to give it a sticky kick!

And remember, overeating is a myth. A full tummy is a happy tummy!

Monday 20 January 2014

Rajma Chawal

Hello boys and girls!

Welcome to cooking with Varun! If truth be told, I am more than a little excited about today's dish! To say that it is my favourite is an understatement. I mean, we're talking about a dish that is embedded so deeply in my life, it's practically a part of who I am! I remember visiting my Nanima (maternal grandmother) in Delhi when I was little, every year when schools broke for summer and occasionally Diwali vacations. I had a special plate that only I would eat out of. Well, there was a set, but it wasn't for everyday use but me being me (and Nanima being Nanima), I always got my plate! (Although my younger sister and my cousins often piggybacked onto my demands and got one from the same set). A white plate with red roses around the circumference, linked with green stems and a big serving of arguably the best rajma chawal in the world, in the middle. Years have past, and Nanima isn't around anymore, but I still get my rajma chawal, cooked using the same recipe, in the same plate, whenever I'm in Delhi.

Thankfully, the magic of Nanima's rajma chawal still lingers in the family's cooking and surprisingly, in my own. A few years ago, I made a trip to Delhi sans my folks to meet Nanima and I was welcomed, not surprisingly, with my favourite rajma chawal. The next day, I went to visit my aunt who also welcomed me with, yes, rajma chawal. To make matters better (yes, better!), the very next day when I went to visit another aunt, I was welcomed once again, with rajma chawal! After 3 consecutive days of rajma chawal, I realized that I had found the one thing that I would never get tired of eating. This was true then and it is true now. And after months of avoiding learning to cook it, for fear that it would never taste as good, I finally gave in and asked my mum for the recipe and was pleasantly surprised to find that I didn't suck at making it. I was in fact, pretty good and having made it a fair few times over the past several months, I have finally deemed myself worthy of sharing it with you.

So crack those knuckles, loosen those limbs, and stretch those muscles, for we are about to dive headfirst into the recipe for the greatest Punjabi dish ever. Rajma chawal!

For the Rajma, you will need the following:


Rajma (kidney beans) 250 gms 
Onion 1 large
Tomatoes 2 large
Ginger garlic paste 2 tsp
Dhaniya (coriander) powder 2 tsp
Jeera (cumin) powder 1 tsp
Red chilli powder 2-3 tsp
Salt to taste
Oil 

Prep:
  1. Soak the rajma in water overnight (or for an hour in warm water if you've forgotten).
  2. Grate the onion.
  3. PureƩ the tomatoes. (Or just use tomato pureƩ.)
Method:
  1. Discard the floaty rajma.
  2. Drain the water from the rajma.
  3. Grab a pressure cooker.
  4. Bounce the rajma in.
  5. Add water until the rajma is submerged under 3 fingers of the liquid.
  6. Pinch in some salt.
  7. Lock the pressure cooker.
  8. Turn the gas on. 
  9. Crank it up to high.
  10. Bung the cooker on.
  11. Daydream.
  12. Break out of your reverie by the cooker whistling.
  13. Drop the heat on the cooker burner to low and leave it for 30 minutes. (Ignore all the hissing and spitting.)
  14. Turn the burner off.
  15. Wait for the steam to escape the cooker. (Don't open it!)
  16. Put on another burner.
  17. Bung a saucepan/kadhai on.
  18. Splash in some oil.
  19. Count to 20.
  20. Arm yourself with the lid to the kadhai.
  21. Slide in the onions.
  22. Slap the lid on to prevent the sputtering oil from making your cook-top all oily!
  23. Cook the onions until they get light brown.
  24. Add in the ginger garlic paste.
  25. Cook until the onions get really brown. (Not unlike my complexion after a football game on a summer afternoon in India.)
  26. Sprinkle in the coriander powder, cumin powder and red chilli powder.
  27. Mix.
  28. Add in a dash of water.
  29. Mix until the powders blend in with the onion.
  30. Pour in the pureed tomatoes.
  31. Cook until the oil separates from the tomatoes indicating the tomatoes are cooked.
  32. Bring the heat down to low.
  33. Shift attention to the pressure cooker.
  34. Lift the weight to let out any lingering steam
  35. Open the cooker. (The rajma should be soft and bursty to the touch.)
  36. Fish out the rajma and add them into the tomato-onion base. (Don't pour the water away!)
  37. Cook for a minute or two.
  38. Pour in the rajma-water from the cooker into the kadhai.
  39. Mix well.
  40. Add salt to taste.
  41. Simmer for a few minutes adjusting the consistency as desired.
  42. Turn gas off.
  43. Serve with (jeera) rice.
  44. Stuff face.
  45. Bask in the glory of your successfully executed dish.


Tip: Leftover rajma is best enjoyed with a spicy parantha.

And remember, overeating is a myth. A full tummy is a happy tummy. 

Tuesday 14 January 2014

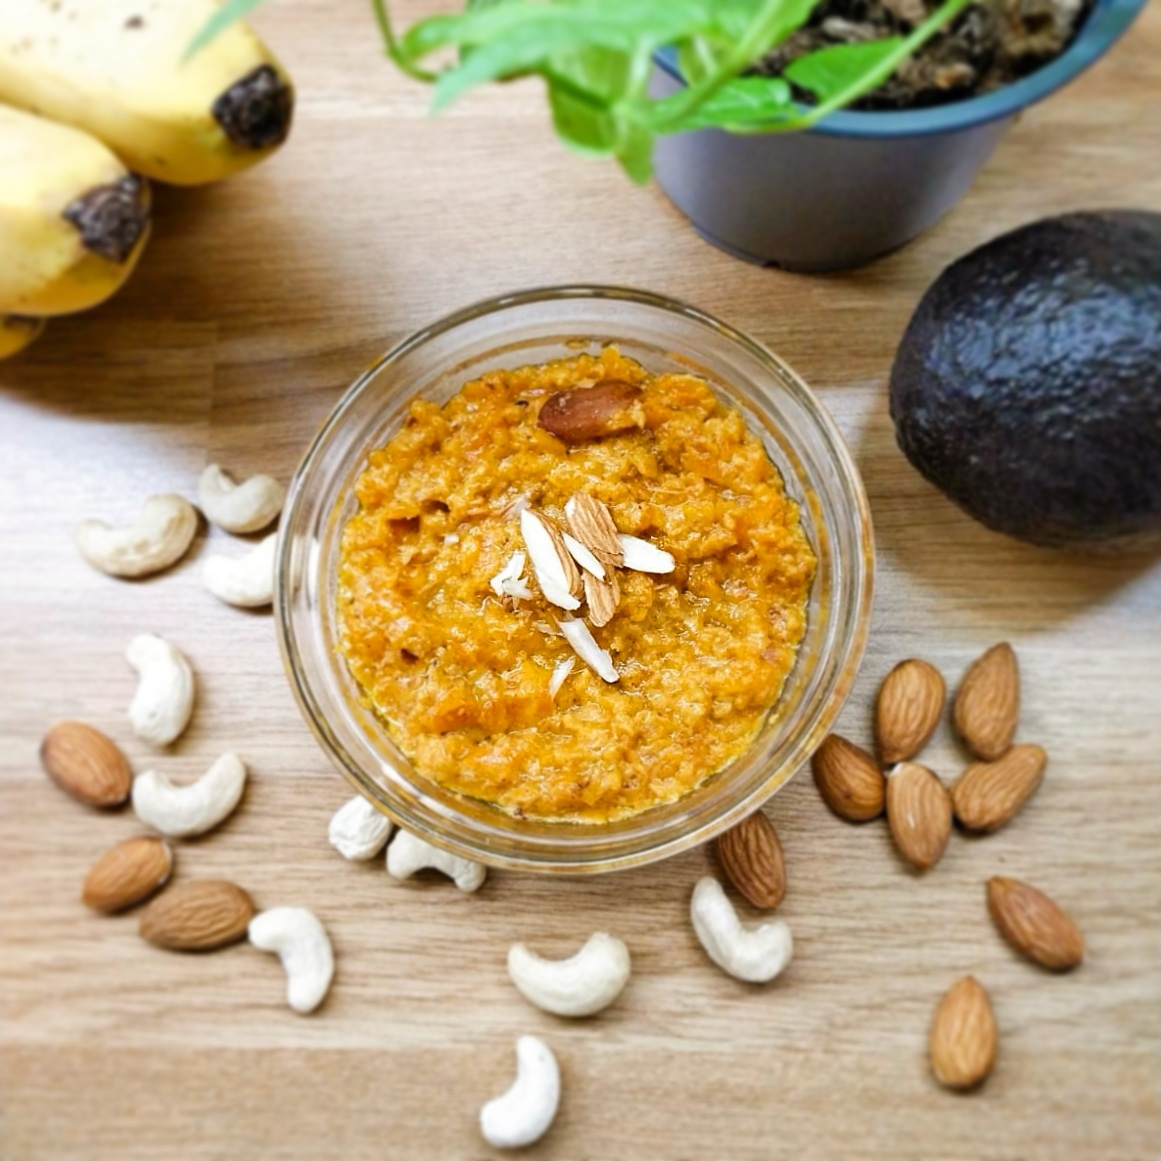
Gajar Ka Halwa

Hello, boys and girls!

Welcome to cooking with Varun! I'm still recovering from a weekend of pigging out on anything I could lay my hands on! From massive bowls of spicy Chinese food to butter chicken and paranthas and a gorgeous walnut, date and honey cake that I baked this past Sunday! Needless to say, my tummy is quite pleased and will soon be subject to several hundred crunches to keep it from going all 'Punjabi' on me!

Speaking of things that make tummies go 'Punjabi', few are more effective than a nice rich dessert, and in my opinion, most other desserts pale in comparison to a big bowl of piping hot gajar ka halwa! (An Indian sweet dish made with carrots, for my non-Indian readers.) Speaking of gajar ka halwa, I made a batch last week and following are the excerpts of the conversation with my roommate that followed: 

Me: Wow, this is good! I'm now officially a Punjabi mom!
Roommate: Hahaha! Yes!
Me: I only wish the carrots weren't orange. It would have looked nicer red, like the one in India instead of this orange one.
Roommate: Oh yes! But how do you make a red halwa?
Me: ...
Roommate: (looks expectantly)
Me: Ummm.. You just use red carrots.
Roommate: Oh..
(awkward silence)

For my Gajar Ka Halwa, you will need the following:
 
Carrots 1 kg
Milk 2 pints (that's about 1.1 lt.)
Green cardamom 6 pods
Sugar 10-12 tsp
Almonds small handful
Cashews small handful
Raisins small handful
Ghee (clarified butter) couple of dollops

Prep:
  1. Wash, peel and grate the carrots. (If you can't do this using a mixer grinder attachment, you are going to be the proud owner of an impressive set of biceps!)
  2. Roughly chop the almonds and cashews.
Method:
  1. Turn the gas on.
  2. Bung a heavy bottomed pan on. (This is to ensure that your halwa doesn't burn and stick to the bottom of the pan.)
  3. Pour in the milk.
  4. Drop in the cardamom pods.
  5. Crank the gas up to high.
  6. Watch it like a hawk! (And I mean like a hawk, if you stop to even dab your watering eyes, or look at the time, or anything that requires you to look away for even one split second, the milk will boil over and you will have a very nice mess to clean!)
  7. Drop the heat to low, the second the milk starts to boil. (Blowing on the surface of the milk will help to keep the milk from boiling over.)
  8. Slide in the grated carrots.
  9. Bump the heat up a tiny bit.
  10. Not that much.
  11. Little less.
  12. Little more.
  13. There!
  14. Let the mixture simmer and bubble until all the milk has almost all evaporated. (This will take over an hour. Move the mixture around every 5-10 minutes to make sure nothing is sticking or bubbling out.)
  15. Once the milk is almost all gone, add in the sugar and mix it well.
  16. Turn on another burner.
  17. Bung on a small pan.
  18. Drop in the ghee dollops.
  19. Count to 20.
  20. Add in the almonds, cashews and rasins.
  21. Toast for a couple of minutes.
  22. Turn the smaller burner off.
  23. Mix the toasted dry fruits and ghee in with the carrots.
  24. Add in a tiny bit more ghee.
  25. Cook for a few minutes.
  26. Turn the gas off.
  27. Beam proudly.
  28. Serve.
  29. Stuff face.
  30. Bask in the glory of your successfully executed dish. 
Tip: Only eat this hot. Stuff with ghee in it does not taste nearly as good when it is eaten cold.
And remember, overeating is a myth. A full tummy is a happy tummy.

Thursday 2 January 2014

Dal Makhani

Hello, boys and girls!

Welcome to this year's very first edition of cooking with Varun! I hope all your hangovers have subsided and you are are now alert and sprightly once again! I myself, was (rather uncharacteristically) very out of it this new years eve, thanks, in no small part to copious amounts of alcohol courtesy all the tequila shots and the beers! (I'm still afraid to check my credit card statements!). A few friends and I went out to paint the town red and boy did we ever! The highlight of the night, however, was when I spoke to (emboldened no doubt by all the alcohol), quite possibly, the prettiest girl in the city, at the party! I know you're thinking, 'Beer goggles!', but I kid you not, this girl was absolutely stunning, and the worst part is, I don't know if I'll ever see her again!

But as they say, life goes on.. and so does this blog post, on to what we can control. Something to help aid the recovery process. A balm for the soul, if you may. Food. The one thing that never disappoints. Always there to pick you up when you're down. Your very best friend.

Some time ago, when we looked at the recipe for butter chicken, we talked about how it, along with some other signature dishes was one of the most ordered dishes at any restaurant or dhaba. Today we will look at the recipe for it's most popular companion, dal makhani. Thick and rich and buttery, with rajma (kidney beans) and a tadka of garlic and chillies, this is best eaten with a soft butter naan and/or another few types of naan!

For Dal Makhani, you will need the following:

Black urad dal 1 cup
Rajma (kidney beans) 1 big handful
Ginger 2 inch piece
Green chillies 2
Red chilli powder 2-3 tsp
Garlic 2-3 cloves
Jeera (cumin) 1 heaped tsp
Salt to taste
Ghee (clarified butter) big dollop
Butter big dollop

Prep:
  1. Soak the rajma in hot water for about an hour.
  2. Julienne the ginger. (Basically just slice it into straws).
  3. Chop the chillies.
  4. Horizontally slice the garlic cloves.
  5. Rinse the dal 3 or 4 times with cold water.
Method:
  1. Grab a pressure cooker.
  2. Drop in the dal.
  3. Struggle to un-stick the wet dal at the bottom of the bowl.
  4. Unsuccessfully use a spoon, a knife and your finger to dislodge the stuck dal.
  5. Give up and stick the bowl in the sink to wash.
  6. Drain and throw in the rajma.
  7. Slide in the ginger.
  8. Add water until the dal is submerged about 3 fingers deep.
  9. Add in about half the red chilli powder.
  10. Sprinkle in some salt.
  11. Lock the pressure cooker.
  12. Turn the gas on.
  13. Crank it up to high.
  14. Bung the cooker on the gas.
  15. Wait until the first whistle.
  16. Bump the heat down to low.
  17. Mentally note the time.
  18. Do whatever you want for the next 25-30 minutes. (In this time, the cooker will whine, groan and whistle. Remember to be brave and ignore all the sounds that it is making.)
  19. After 30 minutes, turn the heat off and set the cooker aside to let the steam escape. (Do not open it!)
  20. Turn on another (preferably smaller) burner.
  21. Bung a pan on.
  22. Drop in the ghee dollop.
  23. Watch it melt into golden-y goodness.
  24. Add in the jeera.
  25. Snap, crackle and pop baby!
  26. Add in the green chillies and the garlic.
  27. More snapping, crackling and popping!
  28. Cook for a minute or so.
  29. Add in the rest of the chilli powder.
  30. Cook for another minute.
  31. Turn the gas off.
  32. Switch your attention back to the pressure cooker.
  33. Lift the weight to let the last of the steam out.
  34. Open the cooker.
  35. Use a wooden spoon (or any other spoon) to check that the dal is cooked and the water has almost all gone.
  36. Turn the gas on.
  37. Bung the cooker back on.
  38. Add in the contents of the pan and mix well.
  39. Either add in or dry off the water in the dal until it reaches the desired consistency. (Traditionally, this is not served too runny or too dry. It has a of a sort of batter-y
    consistency.) 
  40. Taste test for salt.
  41. Empty the dal into a bowl.
  42. Drop in the butter dollop and mix.
  43. Serve with (an optional) swirl of cream and warm naan.
  44. Stuff face.
  45. Bask in the glory of your successfully executed dish.

Tip: Since this is a very rich dish, if you plan to have it often, you could cut back on the ghee and butter or substitute them for olive oil and margarine. This will, however, compromise the flavour to a degree.

And remember, overeating is a myth. A full tummy is a happy tummy!